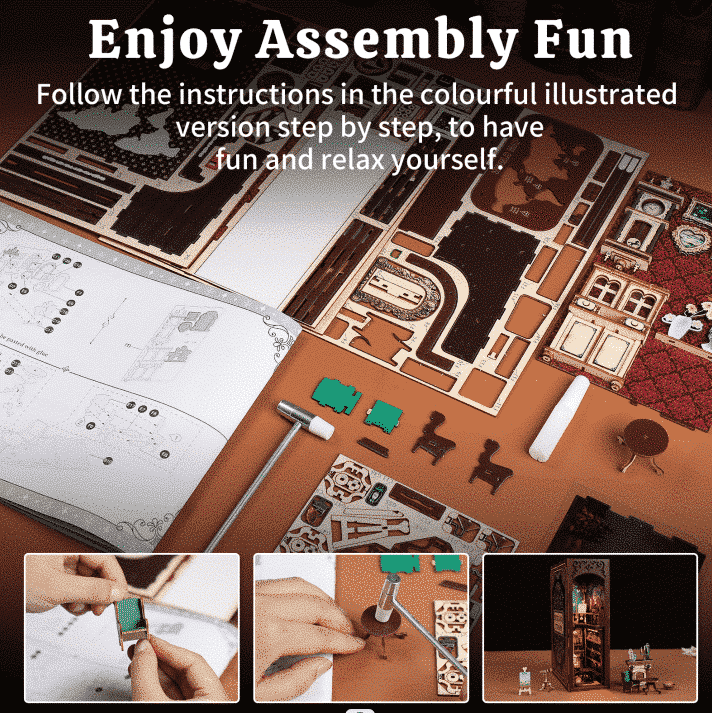
When assembling the gothic book nook, the most common issue is how to figure out the tricky step of assembling three main parts in the Kaayee Gothic Book Nook Kit. I will tell you how to do it in this blog.
First of all, please assemble these three parts separately in advance according to the manual. Next, we'll demonstrate the installation of the left section first. Please prepare the stainless steel rod and two silicone plugs we provided in the kit. First, organize the wires and thread them through the hole. Then align these two holes on top and snap the pieces together. Just make sure the middle edge seam is aligned.
For the bottom, align the holes on the two rods with the holes on the base, then snap the pieces together. Flip to the bottom, and insert the steel rod through the round hole at the base. Flip to the bottom, and insert the steel rod through the round hole at the base. Open up the left section, and guide the steel rod through the second round hole. Then rotate to the outside view - you should see the steel rod coming through the hole in the base. Here, take the prepared silicone plug and slide it onto the steel rod.
You'll need to slide on a total of two silicone plugs here. Then push the steel rod upward through the top round hole — it only needs to stick out slightly, as shown. Place the product on a flat surface, pressing it against the steel rod on top. Adjust the first silicone plug to the top position, and move the second silicone plug to the bottom position.
Next, unfold the product and align the two circled connection points. Please get a short steel rod and two silicone plugs ready. Slide one silicone plug onto the short steel rod, insert the rod from below through the aligned holes, then slide on the second silicone plug. Press the silicone plugs firmly and adjust the distance between the ends of the steel rod. Fold the left section together. The assembly of the left section is now complete.
Next, assemble the right section. Please prepare a stainless steel rod and three silicone plugs, then align the two holes on top. After aligning, snap the pieces together, making sure the middle edge seam is aligned. For the bottom, align the holes on the two rods with the holes on the base, then snap them together. Make sure the inner seams are properly aligned. Flip to the bottom, insert the steel rod through the base hole, use tweezers to slide a silicone plug onto the rod, and then guide it through the second hole. Slowly push the steel rod upward. Slide the prepared second silicone plug onto the steel rod. Guide the rod through the third hole and slide on the third silicone plug. Insert the steel rod through the fourth hole - it only needs to stick out slightly, as shown.
Then place the product on a flat surface and unfold it. Adjust the positions of the silicone plugs. Next, align the two holes at the marked positions. Prepare two silicone plugs and a short steel rod. Slide one silicone plug onto the short steel rod, align the holes, insert the rod from below through the aligned holes, and then slide on the second silicone plug. Press the silicone plugs firmly and adjust the distance between the ends of the steel rod. Then fold the right section together - the assembly is now complete.